Rozier Model - Grand Auditorium
- Steve Gray
- Dec 10, 2021
- 5 min read
Design Principles.
The Rozier model has been a guitar developed over many years. I always wanted to keep this model adaptable for many playing styles. The basis of the guitar shape is that of a grand auditorium. Over time I developed the design to have a slightly rounder top and bottom to allow for a better bridge location and a fuller tonal response.
Features.
This model comes fitted with many design features to give the player the best playing experience.
-Elevated fingerboard for increased responsiveness and playability.
-Side sound port for an immersive playing experience. I have had many conversations with musicians (professional and amateur alike) discussing the inability to hear the guitars true tone whilst playing. This design feature enables the player to really capture the guitars voice whilst playing.
- Arm bevel. I first tried this many years ago and was immediately convinced of its usefulness. This feature adds a comfort to the playing experience that you only appreciate once tried.
-20.5" body length to get a fuller tonal response
Bridge Design and Bracing patterns.
The bracing pattern has been adapted for each style of guitar. I have been using a radial bracing pattern on my nylon string versions and an X braced lower lattice for steel string versions.
Steel String Rozier
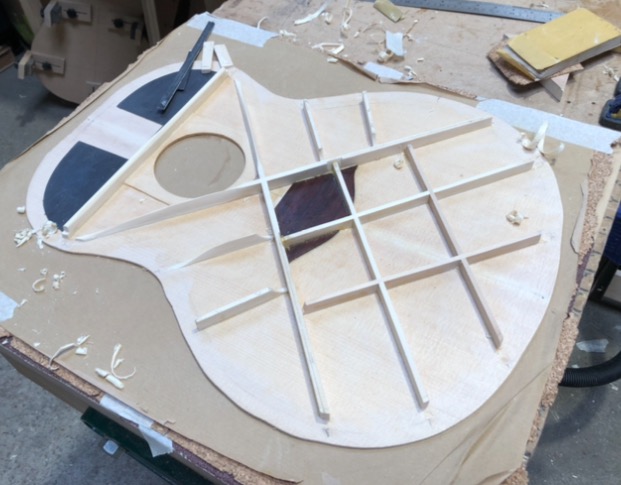
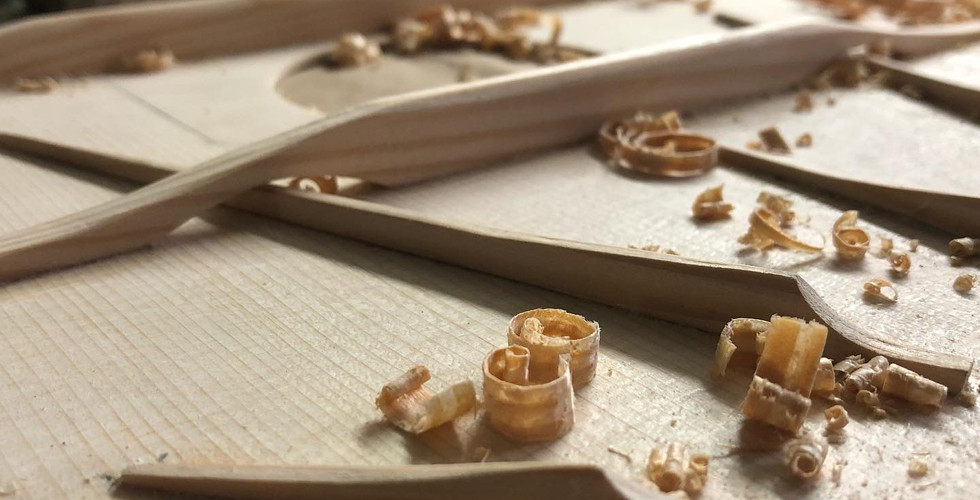
My aim for these guitars was to have a welll balanced tonal response across the active part of the soundboard. To achieve this I settled on an X brace with a lower lattice. I wanted to avoid having any dead spots or areas which would not transmit the strings energy efficiently, the way I have approached this design is to create a unified bracing pattern which allows me to thin the top and reduce mass whilst maintaining enough rigidity to withstand the forces induced by the strings tension. A coupled system as shown below effectively transmits the strings energy throughout the top. *Images taken pre voicing / carving.
The bridge is such an important and sometimes overlooked component. The bridge is very much part of the bracing system, it is one of the keys to the the whole functionality and success or failure of any guitar.
The bridge design needs to take into account many different factors. I'll try to be brief here! Firstly the bridge must tie into the bracing pattern beneath, when it moves it must work in tandem with the braces below. A miss-aligned bridge will inhibit the functionality of the guitar top. A well placed bridge will be the starting point for the strings energy to pass through the bracing below creating the tone and sustain in a finely tuned system. The design must take into account the forces applied when the strings are put into motion, forwards and backwards and lateral movements left and right. The weight of the bridge is also very important, the best analogy I have heard is as follows. "If we think of it being like a car... a heavy car will take more energy to get going but will take longer to stop. A lighter car will take less energy to be put into motion but will come to rest a lot sooner". We need to create something which is light enough to be responsive to the touch whilst being able to transmit energy as efficiently as possible.
My bridge design has taken inspiration from the great master luthier Ervin Somogyi. I must take a nod towards him due to his writing on bridge design and functionality.

Nylon String Models.
The nylon string Rozier guitars have all the same features as the steel string versions. However, where they differ is in the bracing and voicing. Because these guitars work in different ways I have changed the bracing style completely. Nylon string versions are currently built with a radial bracing pattern, the strings energy is so much less than an equivalent steel string guitar and so the bracing needs to be designed accordingly.
The force applied from a standard set of medium nylon strings is almost half of an equivalent set of Medium/light gauge steel strings. Due to these factors the way the top vibrates is completely different. This calls for a totally new approach. The radial design is aimed at controlling the vibrating surface of the guitar. The longer waveform bass notes have longer more flexible bars with which to radiate sound. The higher frequency treble notes have smaller tighter tone bars in which to maximise the strings energy.
Neck and headstock reinforcements.
Headstock binding massively increases the resilience and strength of a potential weak spot on the guitar. The are located under nut where the headstock transitions into the neck is common place for breaks. I have seen many that have been completely snapped off in the past. The problem occurs due to the grain direction of the wood. To help alleviate this problem I have adapted a few techniques to add strength in key areas.
Neck joint. A scarf joint will be used to create the headstock, this will then be reinforced by two "wings", one added each sid of the headstock. This not only helps to reinforce the joint, it also helps hide the join leaving a seamless finish.
Headstock Veneers. I use multiple veneers to create the headstock binding, the same combination of veneers is generally used for the faceplate and the back-strapping. The transition from headstock to body is achieved by cutting out and rounding off the rear of the headstock. The veneers are then bent to fit this form. Once attached this creates a very strong joint and helps to massively increase the durability of this notorious weak spot. With the back-strapping ending midway between the nut and the first fret, this also looks great and adds something visually interesting to the design.
Carbon fibre is also used on the neck to re-inforce and stabilise. Two carbon fibre rods are inlayed close to the truss rod to help stabilise the neck. This process is designed to add a greater amount of resilience to the neck, the neck will flex with the strings tension and the job of the carbon fibre is to evenly distribute this force. This process provides an extra source of stability to the neck whilst helping to prevent warping and other similar issues. The CF also helps in transmitting the strings energy through the neck providing a more constant surface, bypassing any dead spots that may be found in the wood.
I find this feature works very effectively with the elevated fingerboard. The two work so well together in creating a uniform stable playing surface with which to fully transmit the strings energy. More information on this matter can be found on the blog post "The Elevated Fingerboa
For more information on the build process please don't hesitate to drop me a line and i'lll be more than happy to answer any questions about this or any other design.
Steve G


Comments